Gel Nails
Gel nails are a great alternative to acrylic nails because they are less damaging while providing the same benefits as acrylic nails. Gel nails are becoming increasingly popular as people desire a full, long looking nail but do not want to ruin their own nails in the process. Gel nails are a gentler way to achieve long and strong nails. Gel nails also avoid the pungent smell associated with acrylic nails. Gel nails can be applied professionally in the salon or by yourself at home. At a salon you can expect to pay upwards of $35 for a full gel manicure set, but these prices vary greatly depending on the experience and reputation of the salon.
If you are planning on doing gel nails at home for the first time make sure to be patient. It can be difficult to apply them to your own nails, especially when you are applying them with your weaker hand. You will also want to make sure that you have everything you need set up beforehand including old towels, hot water, cuticle oil, cuticle pusher, primer, nail gel, buffer and soap. This will prevent you from having to get up and possibly damage the work you have already accomplished on your nails. You will start by taking off any nail polish with a cotton swab and nail polisher remover. Then you will want to thoroughly wash your hands to remove any dirt and grease. This will leave the nail bed clean and ready for the gel application. Next you will want to buff your nails which will remove any ridges. Using cuticle oil you will gently push your cuticles back allowing for a greater surface area of the nail to show.
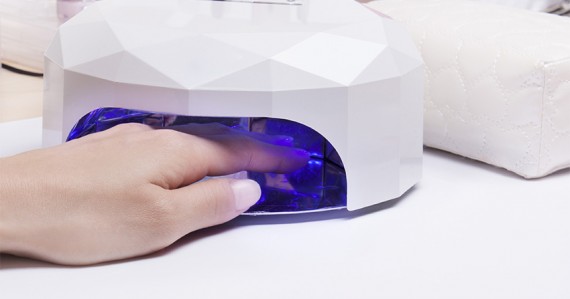
Now it is time to apply the primer using long and even strokes. Only use a thin coating of primer and allow it to dry completely before apply the UV nail gel. You will apply the UV nail gel in the same manner that you applied the primer. Once you have applied the UV gel nail you will set your hands under a UV drying light. You will have to wait approximately five minutes so that the UV nail gel is completely dry. You will then apply a second coat of the UV nail gel and place your hands to dry under the UV drying light again for five minutes. You are now ready to apply your third and final coat. Take your time and be more precise while applying this coat because it will help to give your nails a full coverage look. This is the last time you will need to use the UV drying light. You may want to spend seven to ten minutes under the light to be sure that your nails are completely dry after all of your hard work. You will then use a buffer and Q-tip to get rid of any imperfections. Then you can apply your favorite color of polish to get your new gel nails in tip-top shape.
Sally Hansen Salon Gel Polish Starter Kit comes with all of the essentials to achieving salon-looking gel nails at home. It includes 1 LED Lamp, 1 gel base coat, 1 gel nail color, 1 gel top coat, 10 nail cleansing pads, acetone remover, cuticle stick, nail file and buffer. It allows for up to 2 week wear with zero chips or drying time. You can also get up to 10 gel manicures per kit making it a great investment. This kit retails at department stores for under $70. Red Carpet Manicure is another great do-it-yourself gel manicure set. It comes with a portable LED light, a prep coat, base gel, top coat, cuticle oil, led gel nail polish, application cleaner, instructions and gel nail polish remover.
Being able to do gel nails at home can allow have a professional look inexpensively.